Setting Up the Epson PowerLite Projector
Physical Setup and Connections
TO CONNECT THE POWER SOURCE:
Begin by finding the projector's power cable and an available outlet. Attach the power cable to the outlet and to the power inlet on the back lower left of the projector

A status light next to the power button on the top of the projector should turn red if the projector has been connected to a power source correctly
TO CONNECT TO A LAPTOP:
- The VGA computer cable transmits a signal from your computer to the projector--it will connect directly to PC laptops (attach the cable to your computer and skip to step four if you are using a PC)
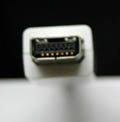
Macintosh laptops require an adapter in order to make this connection. There should be several different adapters stored with the projector--for an iBook or Powerbook, use the adapter with the display connection pictured below:
- Attach the chosen adapter to the VGA computer cable and tighten the connection between the two with the screws on both sides of the VGA cable's head
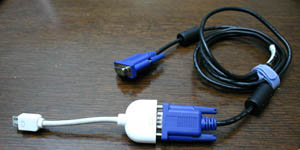
- Connect the adapter to the appropriate slot on your laptop
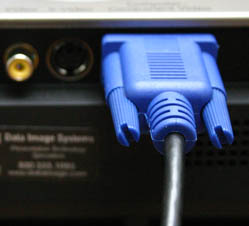
- Connect the VGA cable to the Computer/Component Video slot on the center back of the projector
- At this point, if you press the red power button in the top corner of the projector, the status light should turn green and after a few seconds the projector should display the computer's signal. If the projector is not receiving a signal, make sure that the laptop display settings are correct
TO CONNECT SPEAKERS:
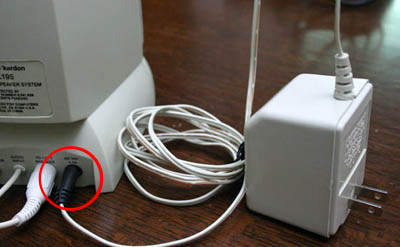
- Before connecting monitor speakers to your laptop, make sure that the speakers themselves are properly connected. Begin by checking to see that the cable from the left speaker is plugged into named slot on the back of the right speaker
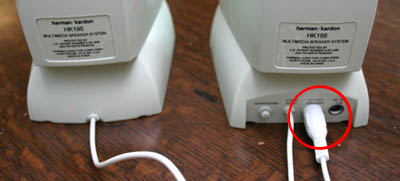
- Next, plug the power source into an available outlet and the appropriate slot on the right speaker
- Connect the green colored audio input from the speakers to the headphone jack on your laptop to make the final connection

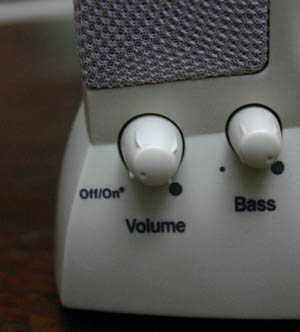
- If these connections are correct, after turning the power dial on the lower front of the right speaker, sound from your laptop should come through both speakers
TILTING THE PROJECTOR:
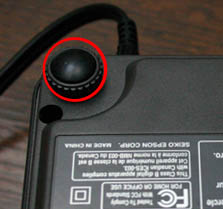
- The Epson Projector has two adjustable supports that allow you to shift the angle at which it will tilt toward the display screen. The first of these is located underneath the front of the projector, on the left side of its lens
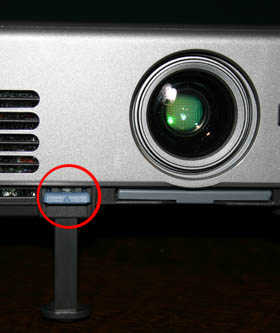
Holding down the blue arrow button adjusts a support that changes the height of the front side of the projector
- The second adjustor for the projector is on its base, in the corner near the power input
Rotating this support will allow you to adjust the height between the projector's left and right sides, evening out the display if the projector rests on a slightly uneven surface
ADJUSTING PROJECTOR ZOOM AND FOCUS:
- On the top of the projector above the lens there are two dials that adjust zoom and focus for the display. The dial further from the lens will adjust the zoom
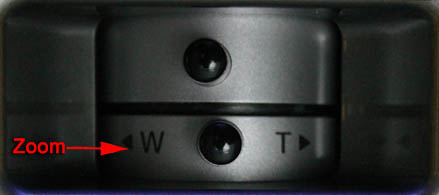
Turn the dial toward to 'W' to enlarge the projected display, toward the 'T' to make the display smaller
- The dial closest to the lens adjusts focus for the display
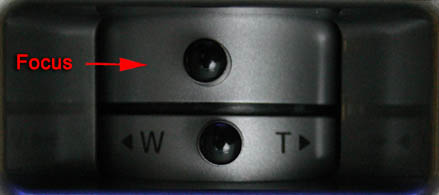
Fine-tune the focus dial until the projected image is clear and crisp
Settings for the Projector
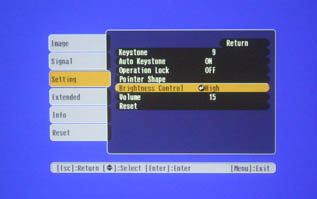
The 'Menu' button on the top of the projector accesses options that affect the attributes of the projected display. The 'up' and 'down' triangles scroll through various attribute options on the menu. 'Enter' will select an option and 'Escape' will return to the previous menu. Pressing 'Menu' a second time will exit all menus

ADJUSTING THE KEYSTONE:
- The angle at which the projector will display an image is affected by its adjustable 'keystone' attribute. To change the keystone setting, access the projector's main menu screen by pressing the menu button on top of the projector itself. Next, press the downward-pointing triangle below the 'Enter' button until 'Setting' is highlighted on the menu
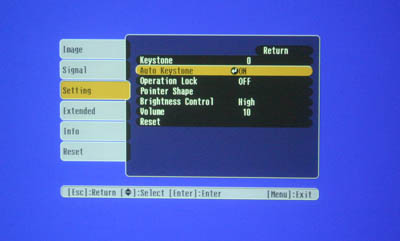
- The second option on the 'Setting' menu, 'Auto Keystone' will automatically square up the shape of the projected image if the projector is at a vertical tilt. Selecting this option by pressing enter will allow you to turn 'Auto Keystone' on and off. However, the automatic option does not always center the image perfectly and you may want to make further keystone adjustments yourself
- Choose the top 'Setting' option, 'Keystone' and use the left and right facing triangles to make manual adjustments to the projector's keystone setting
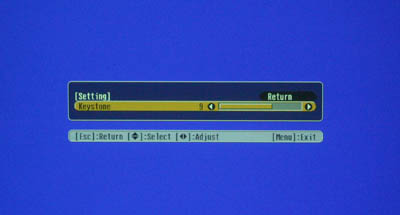
If the keystone setting is too high, the projected image will appear wider at the bottom than at the top--press the leftward arrow to decrease the keystone setting
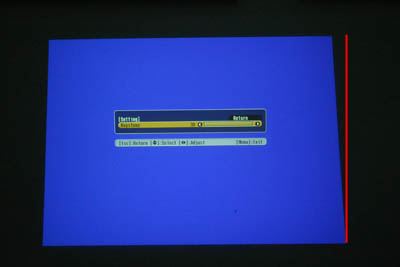
If the keystone setting is too low, the projected image will be wider at the top than at the bottom. Use the rightward arrow to increase the keystone setting
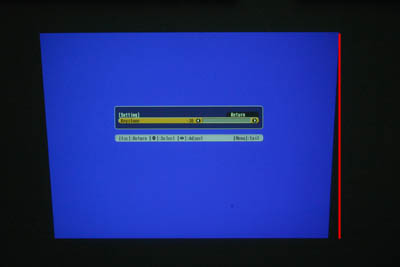
If adjusting the keystone does not result in a squared image, try shifting the angle at which the projector is pointed toward the display surface. The projector's tilt could also be the problem
ADJUSTING DISPLAY BRIGHTNESS:
For the best display, projector brightness should probably be set to HIGH. This is the default setting, but if the display is too dim, a faulty brightness setting may be at fault. Press 'Menu,' then select 'Setting' on the main menu. Under the 'Setting' menu, select 'Brightness Control' to adjust this setting
Laptop Settings
It's possible adjust the projector's display through display properties under the system preferences on your laptop.
- Click on the System Properties icon on the dock (or alternately choose 'System Preferences' under the Finder's Apple menu)
- Choose the Displays panel under hardware:

After clicking on the displays icon, two windows should open up, one for each of the attached displays (the LCD screen attached to the laptop and the connected projector)
NOTE: If the projector is switched on and connected to the laptop but no window opens for its display, try choosing the detect displays option in the LCD display window

- The projector's display window should be labeled 'EPSON PJ'
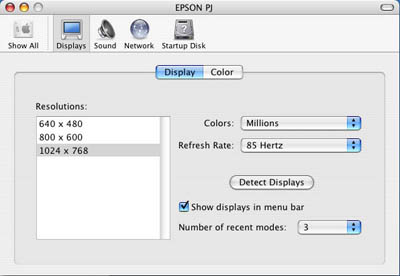
This window provides options for changing the resolution (which should be, for the Epson Projector, no larger than 1024 x 768) and the refresh rate for the Projector Display
NOTE: The refresh rate controls the frequency at which the display from your laptop will be projected. A higher refresh rate will result in better picture quality but slower processing--85 Hertz is a good default setting