Instructions for Using Templates
Installing
fonts
Most of our templates require special
fonts not included with the operating system or with standard applications.
Download the fonts provided on the Template download page and add them to your
system fonts (see below for more information on how to do this on your computer).
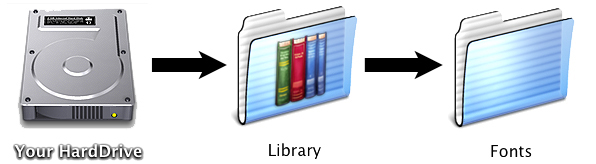
For MacOSX:
To install new fonts onto your Macintosh,
drag the fonts file to the "Fonts" folder found in the following location
on your hard drive:
Installing templates
Templates can be "installed"
into Microsoft Office so they can be readily accessed from within programs like
Word and Powerpoint through the "Project Gallery" and the menus.
- Download the templates and required
fonts from the 1600SEB
website, "Templates" section; install the fonts (see above for
instructions on "Installing
Fonts")
- MacOSX: If the downloaded templates
do not have a Powerpoint icon (
 )
select them, choose "Open with..." from the File menu and, if "Microsoft
Powerpoint" is an option, choose it. Otherwise, choose "Other..."
and manually navigate to the Microsoft Powerpoint application. With the template(s)
open in Powerpoint, select "Save" under the File menu for each template
-- this will save the templates as Powerpoint templates; when you
quit Powerpoint, the downloaded templates should now have a Powerpoint icon.
)
select them, choose "Open with..." from the File menu and, if "Microsoft
Powerpoint" is an option, choose it. Otherwise, choose "Other..."
and manually navigate to the Microsoft Powerpoint application. With the template(s)
open in Powerpoint, select "Save" under the File menu for each template
-- this will save the templates as Powerpoint templates; when you
quit Powerpoint, the downloaded templates should now have a Powerpoint icon.
- Place
the template files into the "My Templates" folder of Microsoft Office
(see below for more information on how to find this folder on your computer).
MacOSX:

Using templates
There are two common ways to access
and use templates from within Microsoft Office.
- Once the templates are installed,
you can access them from the Microsoft Office Project Gallery:
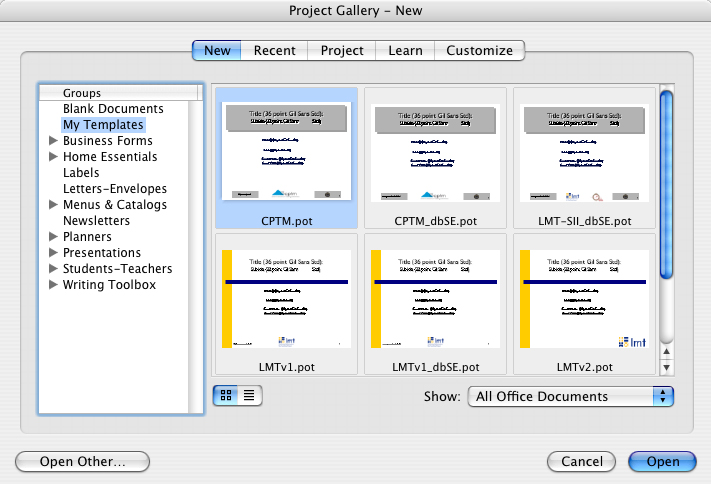
- The Project Gallery usually opens
when you initially launch Microsoft Word, Powerpoint, or Excel.
- You can also call up the Project
Gallery by choosing "Project Gallery..." under the file menu
- For Powerpoint documents, you
can also apply a design template to an existing set of slides by choosing
"Slide design...." under the Format menu.
NOTE: The design can be applied
to all slides in the file, to the current slide, or a selection of slides