

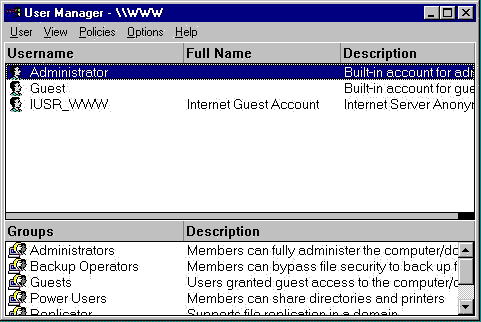
 The first of our post-installation tasks is to create a user account.
Use
Start | Program | Administrative Tools (Common) | User Manager.
Within User Manager run User | New User.
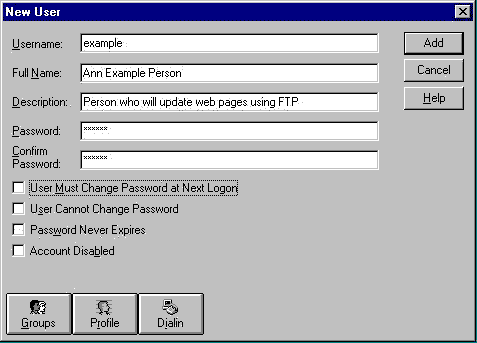 Type in the name and account for the new user. Set the initial password (twice).
Also, uncheck the "Change password at next log-in". If this user is to use FTP only, they have no way to change their password and this will prevent them from using FTP.
You may want to create some groups and use those groups to control who can and cannot use various services. This tutorial will not cover those techniques.
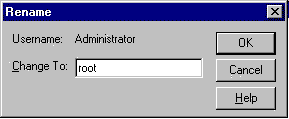 Some system administrators suggest that you rename the Administrator account. This makes it slightly harder for a hacker to gain administrator access to your system.
This step is optional. It is found in User manager under User | Rename.
P.S. the name used in this example "root" - is just about as bad - so choose another administrator account name
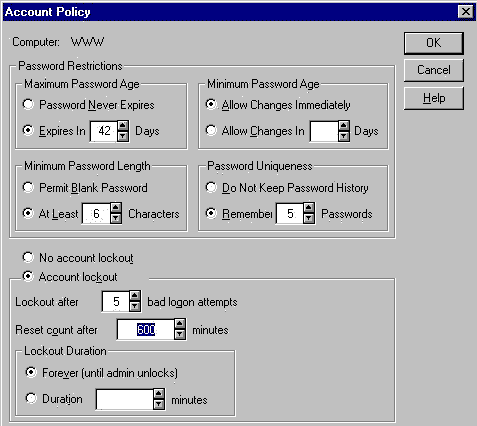 You need to set some account policies. These can be found under
Policies | Account. The default settings are probably too lenient.
The settings shown here are probably more typical. (You may have to click on the image to enlarge it)
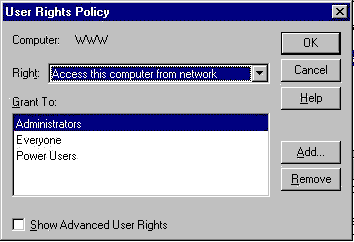 Under Policy | User Rights, you can change a variety of the rights that various users can have. By default these are pretty lenient.
You may want to restrict these somewhat. This would be a good reason to create a group called "Network Users" (see User | New Local Group ) and then individually add those users to this group that you are willing to have come in over the network. Then under User Rights, only the Administrators and Network User groups would be allowed to come in over the network.
To increase security, you might want to indicate that administrators can not come in over the network. But you will then need physical access to the system to do many of the administrative chores. Much of a security design is a balance between convienence and airtight security.
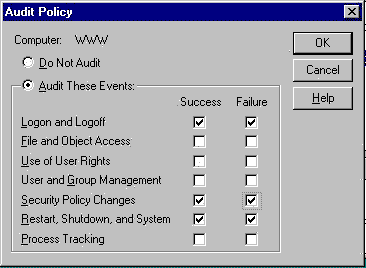 Under Policies | Audit we again see a very lenient default setting. By default there is no auditing. A more reasonable setting is shown in this example (you may have to enlarge to see detail).
 Next we will make some disk adjustments which include creating a D: partition. This is done by running
Start | Programs | Administrative Tools (Common) | Disk Manager.
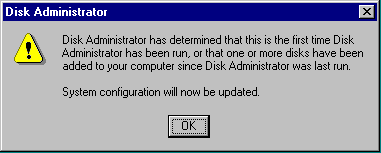
The first time this is run, a small dialog box comes up. Press OK
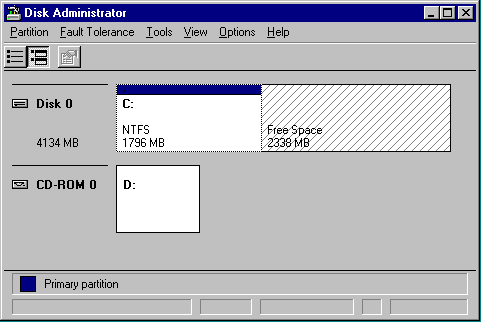 This is the disk administrator. We can see the C: partition and empty space on the hard-drive. We can also see the CD-ROM drive at the D: drive letter.
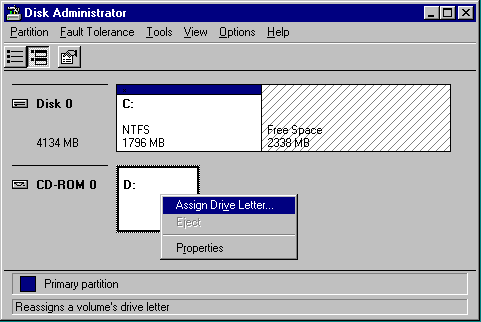 First we must move the CD-ROM to a new drive. We right-click and select Assign Drive Letter
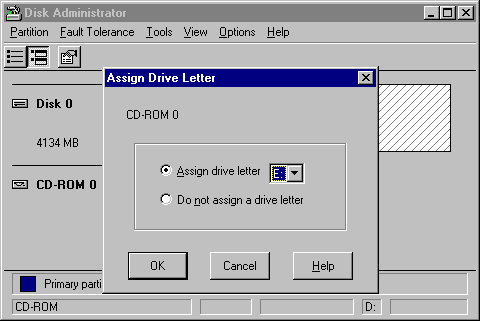 We select that the CD-ROM is to be the E: drive.
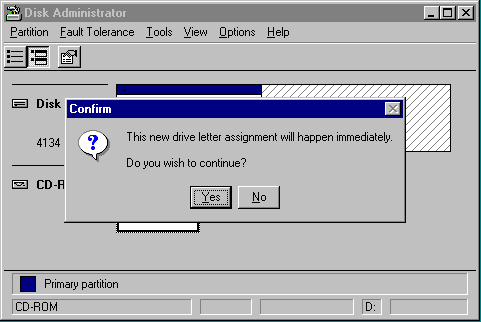 We are given the option to have this be done immediately - we select Yes
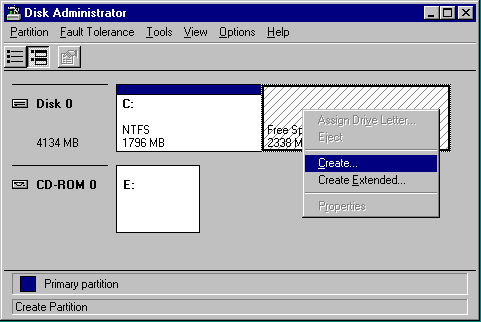 The CD-ROM has been moved to E: so we can assign a drive letter to the unassigned space on our hard drive. Use right-click and select Create to create a partition.
Note: We could have simply made this the E: drive and saved some effort. But this approach leads us to demonstrate a few other techniques. Feel free to simply make this the E: drive in your installation. But then a few things will be slightly different later in the tutorial.
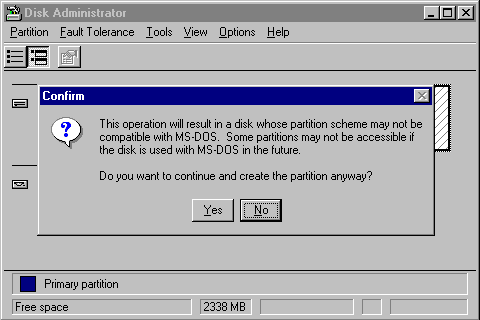 This is creating an NTFS partition - it asks us if we are cool with that. Say Yes to NTFS!
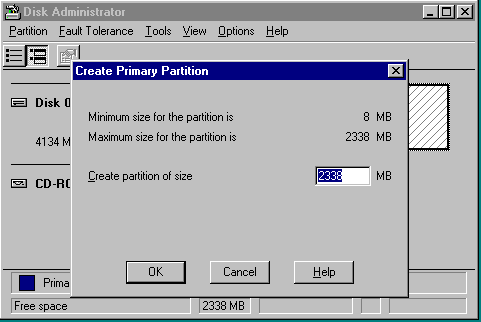 We fill in the partition size. By default it is using the remaining space on the hard drive and has precomputed the size for us. We accept this value.
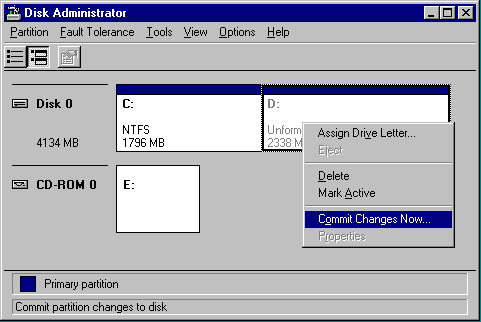 Now we must make the changes permanent - right click on the new partition and select
Commit Changes Now...
 Yes, we are sure.
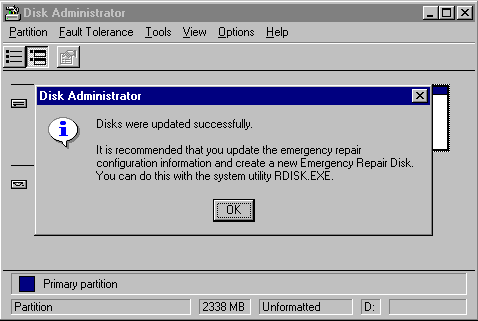 This should only take a moment - it is just updating the partition table.
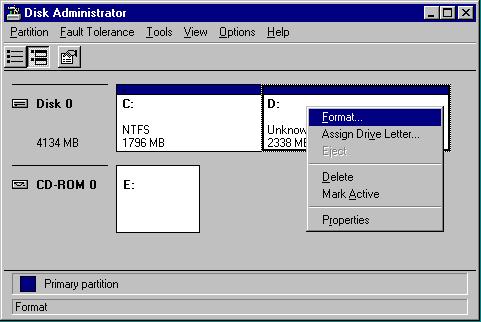 To format the disk, we right-click and select Format
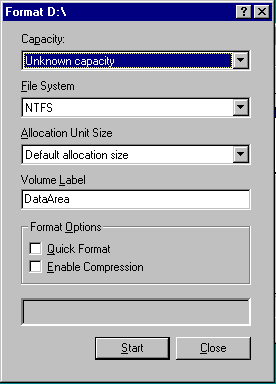 We select the parameters for the disk. Make sure to select NTFS. You should not
select compression.
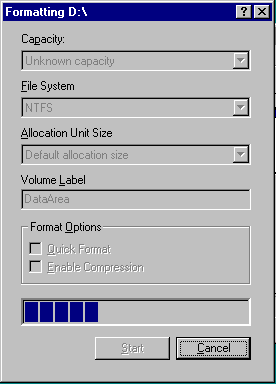 Disk formatting may take a few minutes depending on the size and speed of the disk. When formatting is complete, exit the Disk Manager.
 Now that we are done making and moving disks, there is a little clean-up. The registry still believes that we installed NT from the D: drive. We just moved the CD-ROM to the E: drive. We need to clean up this little mess or we will keep getting dialogs as we reconfigure NT and it needs little bits of information off the CD. It just means that we need to use Browse each time. But this is inconvenient. And it gives us a good excuse to use regedit.
Warning: Regedit is the system administrator's friend and enemy. It is the entire configuration of NT - so you can fix anything or break anything. So be careful.
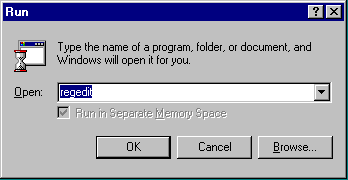
To run RegEdit, use Start | Run | regedit | OK.
P.S. If we had formatted our new disk space as E:, we would not have to do this step. Later in another exercise we will show a different technique for creating the C and D drives.
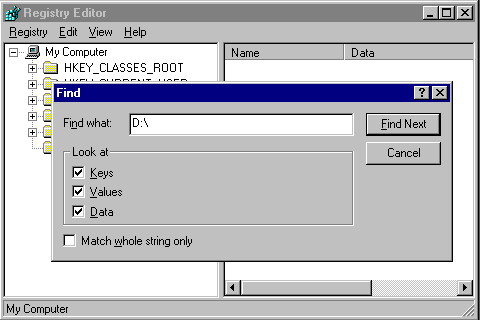 We search for values in the registry which start with D:\. Those are the values which point to the former CD-ROM location.
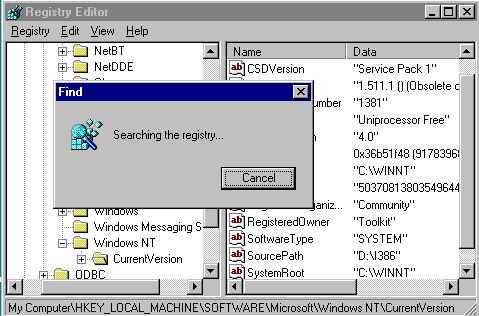 The program searches the registry...
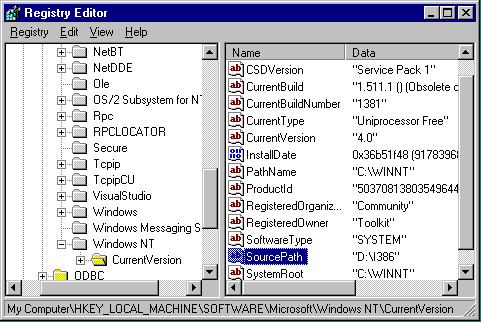 Each time, it finds a value which matches, it stops its search. To edit the value, double click on the key (highlighted in this example).
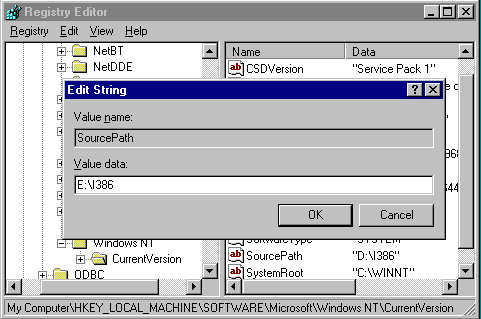 Then you are presented a dialog box to change the value. Carefully change the D: to E: and press OK. Then press F3 to search for the next occurrence. When it is found change that value until you have caught all the values.
There should be about 5 values which match "D:" after a fresh install. This procedure will not work so well after a wide range of other software packages are installed.
Once this is all done, it would be a good time for a reboot and a quick test of the disk drives, CD-ROM and networking.
